Office
How to Setup Scan to Folder on a Sharp Copier
Learn the step-by-step process of setting up scan to folder on a Sharp copier to streamline your document management.
Fix your Sharp copier's Scan-to-Email feature with Gmail by following our step-by-step guide to enable 2-Step Verification and generate an App Password.
A step-by-step guide to getting Scan to Email working again after Google's security changes
If your scan-to-email suddenly stopped working and you're sending to a Gmail address, you're not imagining things. Google changed their security rules a while back and now requires two extra things before any device like a copier can send email through Gmail: 2-Step Verification turned on, and an App Password generated for the copier to use instead of your regular Gmail password.
The good news: the fix is pretty mechanical once you know the steps. Here it is end to end.
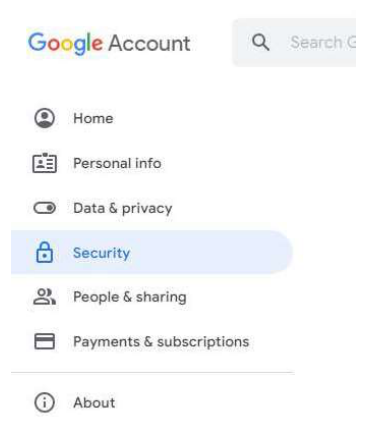
Sign in to the Gmail account that the copier uses to send scans, then click your profile photo and choose Manage your Google Account. From the left menu, pick Security.
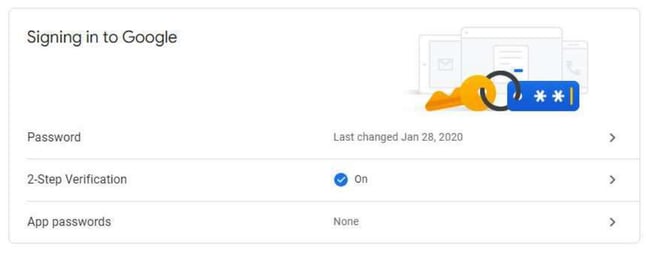
Scroll down to the section called Signing in to Google. You'll see entries for Password, 2-Step Verification, and App passwords. Click 2-Step Verification and follow the prompts.
Google will ask you to enter your Gmail password and provide a cell phone number. They'll text you a 6-digit verification code to confirm. Enter it, and 2-Step Verification is now active.
Now that 2-Step Verification is on, go back to the Security page and click App passwords. Use the dropdowns to select Mail for the app, then Other (Custom name) for the device. Type something like Scan to Email as the name.
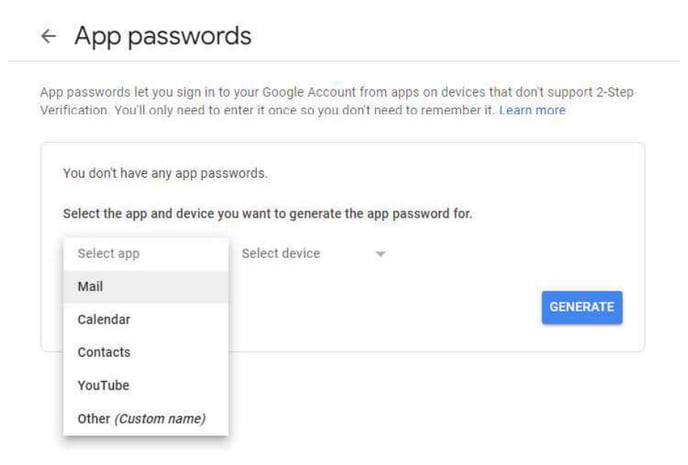
Click Generate. Google will display a 16-digit password. Write this down or copy it somewhere safe right now — you'll need to paste it into the copier in the next step, and Google won't show it to you again.
Open the Windows search bar and type "printers." Click Printers & scanners in the results.
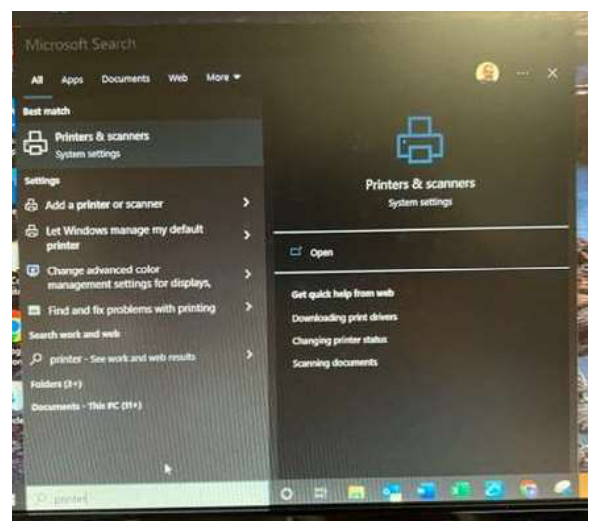
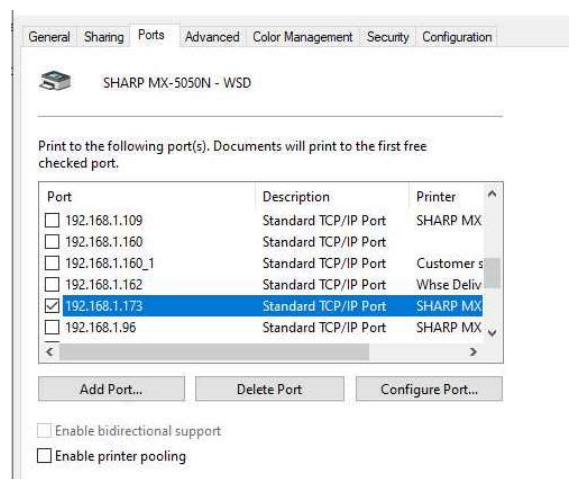
Find your Sharp copier in the list, click it, choose Manage, and then Printer properties. Click the Ports tab and look for the checked port — that's the IP address you need.
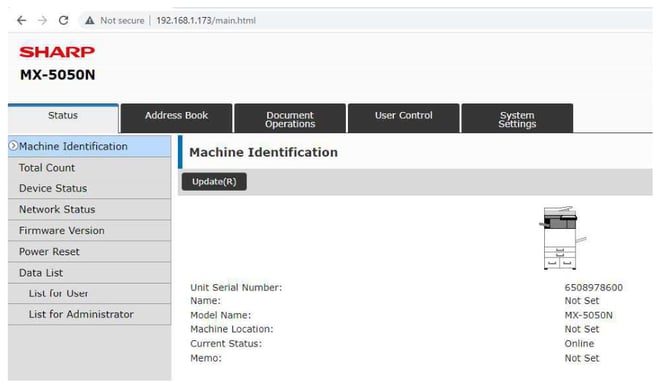
Open Chrome or your preferred browser and type the copier's IP address into the address bar. Press Enter.

You should see the Sharp web interface load up.
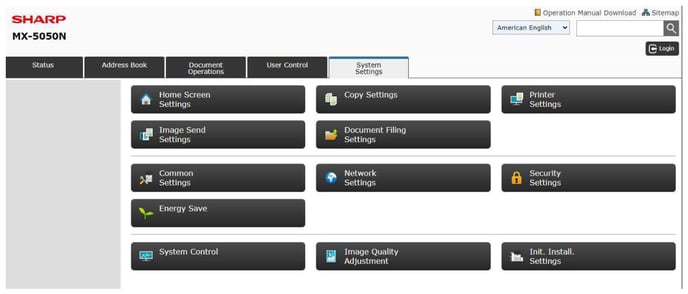
Click the System Settings tab at the top, then click Network Settings.
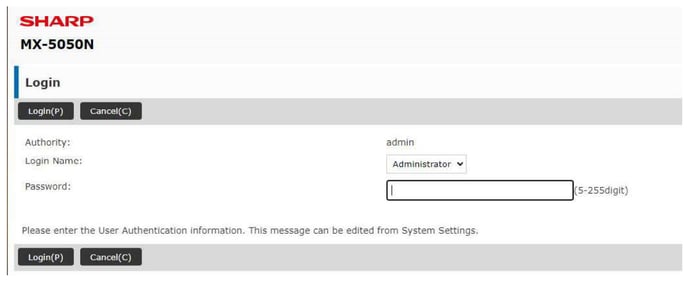
The Sharp will ask you to log in. The default Login Name is Administrator and the default Password is admin (all lower case). Click Login.
In the left menu, click Quick Settings, then scroll down to the SMTP Authentication section.
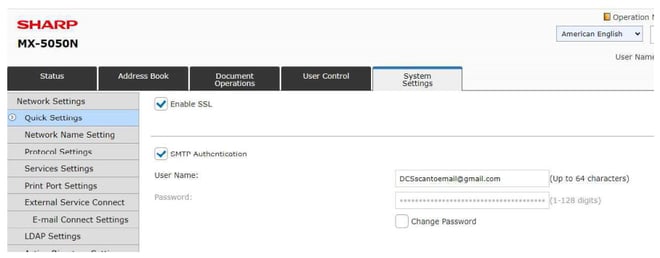
Confirm the User Name matches the Gmail address you've been using for scans. Then check the Change Password box and paste in the 16-digit App Password you generated earlier. Click Submit at the bottom of the page to save.
Important: Paste the App Password without any spaces. Google displays it with spaces between every four digits for readability, but those spaces aren't part of the password.
While you're still on this page, find the Connection Test section and click the Execute button.
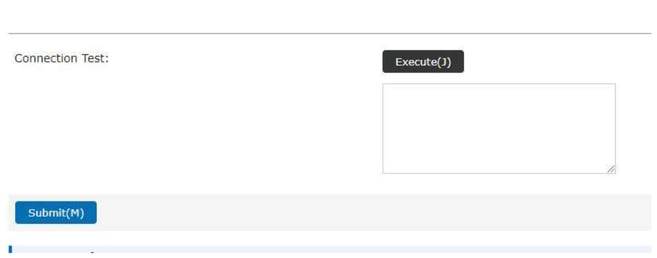
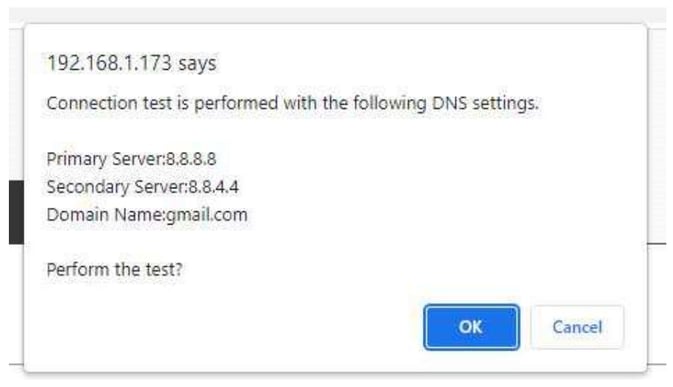
A confirmation popup will appear listing your DNS servers (typically 8.8.8.8 and 8.8.4.4) and the domain name. Click OK to perform the test.
If everything's right, you'll see "Connection to SMTP server test succeeded" at the top of the page.
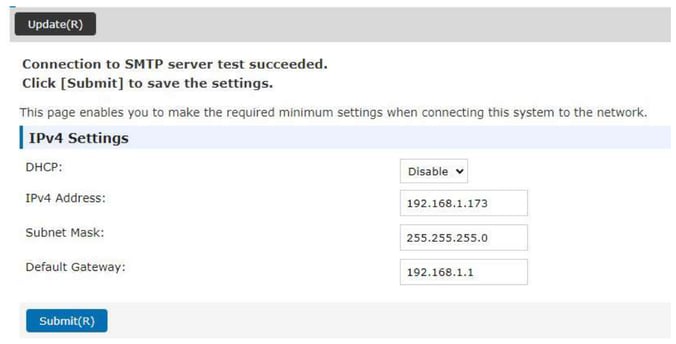
Click Submit one last time to save everything. Let the copier reboot if it asks, then walk over and try scanning a document to email. It should land in your inbox within a minute or two.
The most common cause is a typo in the 16-digit password. Try entering it again — slowly, no spaces — and re-run the connection test. If it's still failing after a clean re-entry, double-check that the User Name field exactly matches the Gmail address you generated the App Password from.
Going forward: the App Password is tied to that specific Gmail account and device label. If you ever change Gmail accounts or want to revoke a copier's access, you can do it from the same App Passwords screen in your Google Account — just delete the one named "Scan to Email" and the copier will stop being able to send.
Learn the step-by-step process of setting up scan to folder on a Sharp copier to streamline your document management.
Learn how to quickly add contacts to your Sharp copier's address book for easier scanning and emailing, saving you time and effort.
Learn how to set up Scan to Email on Sharp copiers with this detailed guide covering DNS, SMTP, and authentication settings for Gmail.
Be the first to know about new copier repair tips and tricks.
